An insulated, spacious kennel is a guarantee of excellent mood and good health for the dog. Keeping your pet in damp and cold for a long time will certainly lead to the development of illnesses.
You can make a house for an animal yourself within a few hours, without spending money on expensive ready-made structures.
You should first consider the design of the building and choose the preferred material for interior and exterior decoration. Once inspired with ideas, you can get to work.
Kennel dimensions
First you need to decide on the parameters of the kennel, such as its width, height and depth. The size of the dog house depends entirely on the size of your pet. If the kennel is small, then the animal in it will be stuffy and cramped, but if, on the contrary, it will be cold. To determine the depth, you need to measure the distance from the dog's nose to its tail. To determine the height, measure the height of the animal at the withers and add 5 centimeters to the result obtained. The height of the hole is made 5 centimeters more, and to determine its width, measure the dog’s chest and add 5 centimeters to the resulting figure.
The image clearly shows how to take measurements correctly, as well as the size of the kennel for some dog breeds.
The size of the booth directly depends on the size of the future owner of the house Source heaclub.ru
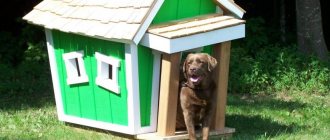
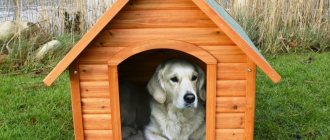
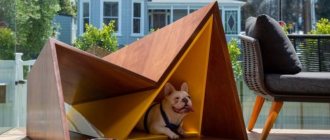
Photos of beautiful
If the site is designed in accordance with the rules of landscape design, then a simple dog house made from boards may not fit into the overall look. By building a structure with your own hands, you can turn on the artist’s imagination and decorate a house for your four-legged friend. To do this, you can use both improvised materials and wood carvings.
Selection of material and insulation
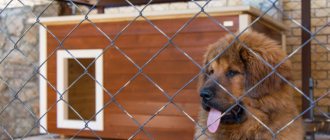
In most cases, a doghouse is made of wood, since it remains cool in the summer heat and warm in the winter cold. Especially if you fit the wooden boards closely without gaps or cracks. In addition, wood is an absolutely harmless material. A high-quality dog house made from timber will last at least 6-7 years without losing its appearance.
Brick and concrete booths are far from the best option. They, of course, conduct heat well, but they are unbearably hot in summer and cold in winter. And most often, animals prefer to sleep in the open air rather than in such a kennel.
To save money, you can choose a kennel made of plywood and fiberboard. But since plywood is thinner than wood, building a warm dog house will require more than one layer of material.
For insulation, foam plastic, mineral wool or other suitable material is usually used. The main thing is not to overdo it when insulating with polystyrene foam, since it is airtight. Due to the lack of fresh air, the dog will not want to be in such a kennel, especially if you curtain the hole. In addition, do not forget that the floor and roof of the booth must also be insulated. But even here the insulation layer should not be too large. To prevent wind from blowing into the kennel in winter, thick fabric cut into wide strips is nailed over the hole.
An example of a booth with an attached “dining table” Source zen.yandex.ru
Tools
Before you start building the structure, you should prepare the necessary tools:
- screwdriver;
- hacksaw;
- hammer;
- marker;
- ruler or tape measure;
- plane - if unplaned material was purchased;
- metal scissors.
Also, before starting work, prepare the material:
- fasteners - screws, nails;
- bars, boards, lining;
- roofing material;
- insulation;
- plywood or chipboard;
- impregnation to protect wood from external influences.
Important ! All boards and beams should be sanded before building the kennel so that the dog does not get hurt. Only the outer walls of the structure are treated with impregnation, otherwise there will be an unpleasant smell in the booth, which the dog may not like.
You also need to take care of the thermal insulation material before starting assembly, and choose the best option in terms of environmental friendliness, practicality and affordability.
Roof type
The roof of dog houses can be gable or single-pitch. A kennel with a pitched roof is more popular, as dogs are very happy to sit on it. In addition, the smaller the area of the room, the faster the air in it heats up. And given that there is no heating in the kennel, and the air is heated by the heat generated by the dog’s body, such a kennel will be warmer in winter. Wood is used as a material. Roofs made of metal materials are not popular, because in hot weather it heats up, and in cold weather it does not retain heat at all. The roof slope is installed in the opposite direction from the entrance. This is done to prevent water from getting into the kennel during rainfall. The angle of inclination of such a roof should be at least 5-10 degrees.
Also, sometimes a ceiling is built in the booth, and a gable roof is placed on top. In addition, then it is possible to make it removable or arrange a closet in it. You can store your pet’s toys in it, and this structure will simplify cleaning and disinfection. This trick is used by those who do not at all like pitched roofs in appearance. The angle of inclination of a gable roof can vary from 5 to 60 degrees.
A booth with a gable roof made of wood for a small dog Source selogni.ru
Step-by-step assembly of a kennel with a pitched roof
- The base for the floor is knocked together from beams on a flat surface and the resulting frame is sheathed with boards or sheets of plywood.
- Next, you need to turn the assembled structure over with the beams up and tightly lay foam or mineral wool between them. The thickness of the insulating material will depend on the parameters of the wooden blocks. Next, the frame is covered with boards and firmly secured with self-tapping screws. The floor for the booth is ready.
- For the next stage, you need to take 4 bars measuring 10 by 10 centimeters, the length of 2 of them will be equal to the height of the kennel, and the other 2 will be 10-12 cm longer than the previous bars. They are installed at the corners of the base, short on one side and longer on the opposite side. This arrangement of the bars is necessary to form a roof slope. Additional bars are installed between the corners in the center of each wall, as well as on both sides of the future hole. Angles and screws are used to secure the beams, and a level is used to check the vertical position of the beams.
Approximate dimensions of a booth with a pitched roof: the rear part is lower than the facade Source abpolar.ee
See also: Catalog of popular projects of “small forms” for a country house
- To cover the outer surface, clapboard or plywood is used. The walls are insulated according to the same scheme as the floor of the kennel. At this stage, special attention should be paid to ensuring that there are no protruding nails or screws left inside the box, otherwise this may harm the health of your pet.
- The roof is constructed according to the same scheme as the base of the booth. But there is one difference: the roof should be a little larger in size. The resulting structure is installed on the booth and secured. To ensure water resistance, the top of the roof is covered with slate or roofing felt.
- The outside surface of the kennel is treated with impregnation; this cannot be done inside so as not to harm the dog’s health. The floor is covered with roofing felt.
- The booth is installed in a well-lit, level place with a large view near the house.
When installing a booth, you need to remember that it must be protected from drafts Source orgtorg.org
Step-by-step assembly of a booth with a gable roof
- For the construction of the floor frame, 4 bars are used. Next, 4 more bars with a length equal to the height of the booth are driven vertically into the corners. At the end of this stage, the vertical pillars are connected by 4 more bars.
- To build a gable roof, rafters are used. To do this, take 2 wooden blocks and fasten them together at an angle of 40-45 degrees. Using this principle, 2 rafter legs are made, which are secured on both sides of the booth. Next, they are connected to each other by a ridge purlin, which should protrude 20 cm from the front of the kennel. To better understand the structure of a gable roof, use the drawing.
Drawing of a gable roof. 1 – rafters; 2 – transverse fastening; 3 – Mauerlat; 4 – ridge run. Source selogni.ru
- Just as when assembling a kennel with a pitched roof, clapboard or plywood is used for cladding, and the floor is covered with roofing felt. If necessary, beams can be used for the stand.
- To sheath the roof, it must be removed and the inside covered with plywood. Then the roof is turned over, and glassine is fixed on top of the plywood, on which the thermal insulation material is laid. To ensure that the roof can be easily removed and put back in place, holes for nails are drilled in the gables.
- To make the roof of the booth waterproof, its surface is covered with roofing felt.
Drawing of a dog house with a gable roof Source selogni.ru
See also: Catalog of construction companies that offer the service of building extensions to houses, fences and utility structures
Design with vestibule
To build such a kennel you will need simple boards. The difference from other options is the insulated partition with an entrance. The thickness of the bars should be at least 2.5 cm, and the dimensions of the bars should be 4x4 cm or slightly larger:
- First, the wooden frame is assembled. The floor will be ideal if you lay a piece of plywood on top. To insulate it from below, you can sew up OSV - with a slab or simple boards, laying insulation under them.
- To moisture-proof the lower part of the booth, the frame is sheathed with roofing felt using a stapler. To prevent the floor from getting wet, it is advisable to make legs under it or install the building on level stones. The walls of the booth are lined with bars.
- The boards should be nailed to the frame horizontally so that the lower edge of the top plank overlaps the cut of the board from below. Next, the walls are insulated from the inside. To do this, vertical strips are stuffed onto them and insulation is laid between them. After this, cover the top with film and cover it with a sheet of plywood.
- To simplify the manufacture of wall ceilings, instead of boards, you can use OSV - slabs. The final step in constructing a kennel is making the ceiling and roof.
After familiarizing yourself with the options for booths and assembly techniques, you can choose the most suitable one for your pet. A well-built structure will serve the dog for a long time. The dog will appreciate taking care of himself, in return giving his owner his love, devotion and fidelity.
Building a brick booth
The brick booth is distinguished by its strength and durability. This kennel is suitable for a large dog. The materials for building such a booth can be cinder blocks, bricks and foam blocks. Stages of building a brick kennel:
- First you need to clear and level the area for the booth. Then they dig a trench under the foundation of approximately 250x250 mm, which is filled with concrete and left for several days.
- When laying out walls, you must carefully monitor the level and observance of right angles in the structure. For the manhole, the required number of bricks are passed along the width. When the masonry reaches the height of the hole, a wooden beam must be laid across it. They continue to lay bricks on top of it all the way through.
- To insulate the inside of such a booth, its walls and floor must be lined with wood.
- A wooden floor is installed on the roof and a slate roof is installed on it.
And if there is a strong minus outside. Do you need to take your dog into a warm place?
First, let's define what kind of dogs we are talking about. We think that in most cases these are at least medium breeds weighing 10 kg or more. It is better not to take such dogs home in cold weather. Even when it’s -20 °C outside, even when it’s -30 °C and below. By taking your dog into a warm place - no matter in a house or a barn - you are still doing him the same disservice.
There is no need to worry about your pets. Nature has made them more perfect in terms of adaptability to external conditions. As cold weather sets in, their body is actively rebuilt: the animal’s undercoat grows, biochemical processes are optimized so that the necessary part of the energy is spent on heating. By keeping your animal warm, you disrupt the functioning of this delicate mechanism, which results in stress and discomfort for the dog. The best way you can show care in such a situation is through proper nutrition. In the cold season, the diet needs to be made more caloric or additional feeding should be introduced.
Double kennel
A kennel for two dogs is an excellent option for owners of two pets at once. It means 2 separate “rooms” under one roof. Most of these booths are one-story with 2 different entrances. Inside, the oblong kennel is divided in half using a vertical partition. In general, the assembly and insulation of such a kennel is not much different from a regular kennel.
A “house” for two owners is assembled in the same way, but there is a partition between the two “rooms” Source selogni.ru
Warm for the winter
You understand that if a dog’s house is located on the street, it needs to be made warm! How to insulate a booth? To build a winter insulated kennel, in addition to other materials, you need to prepare insulation. The cheapest is polystyrene foam.
How to make a warm kennel (with drawings):
- Kennel base. Cut the 5x5 cm bars into 2 pieces of 700 mm and two of 900, resulting in a booth 900x700 mm.
- Niche for heat insulator. You will need 4 bars - 2 x 900 mm and 2 x 600 mm using self-tapping screws to secure them to the base.
- Insulation . Cut the insulation to size and place it between the blocks.
- Floor arrangements . Cut boards 900 mm long and place them on the frame from the outside of the kennel.
- Side walls. We arrange the side walls. To do this, take boards 650 mm long and bars 400 mm long, assemble a frame to which you can screw the boards. Install the walls and screw them to the floor at the corners.
- Front and back walls. We construct a hole in the front wall using bars and screw it to the frame. Install the back wall last. Fasten the walls with self-tapping screws. Install insulation, cut to the size of the walls. We cover the insulated walls with boards or plywood.
- The roof of the booth . Screw plywood to the walls and sew bars on it. Lay insulation. Sew up the roof insulation with boards. Lay roofing material.
Frame for floor with insulation
Floor insulation
Insulation of walls with foam plastic
The construction is complete, all that remains is to install the insulated structure in place.
Photo of a booth insulated according to all the rules: