It is rare that the owner of a private house prefers not to plant fruit trees on his property. Everyone usually wants to have an orchard - in the spring, trees delight with beautiful blooms and aroma, and fruits and berries from your own garden always seem much tastier than those bought in a store or at the market, and besides, you know that these are environmentally friendly products. In the art of Feng Shui, the image of a blooming orchard is a symbol of abundance and prosperity. Planning a garden is a responsible matter; their growth and ability to bear fruit will depend on how correctly you plant the trees, so this task must be treated with great attention.
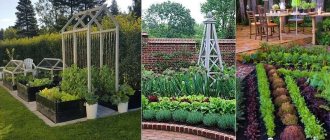
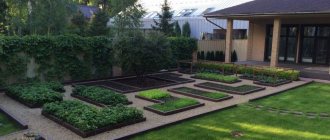
If you also want to grow vegetables in your garden, the layout of the garden and vegetable garden should be considered together. It is better to allocate space for the beds at the southern border, from north to south, this is better for crops growing in the middle zone. Some gardeners recommend placing beds from east to west. Behind the vegetable and strawberry (strawberry) beds there are fruit bushes - currants, gooseberries. Trees are planted behind the bushes; light shade from trees will not harm berry bushes, and vegetable beds should be in the sun.
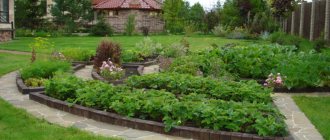
An example of the design of vegetable beds - they do not have to be square or rectangular in shape, the original beds resemble flower beds
Preparatory work
When planning a plot of land, it is necessary to allocate an open sunny place with high groundwater levels for the garden. You cannot plant a garden in a low area where cold currents of air and water will flow during spring floods. After an external inspection of the land allocated for the garden, determine and write down a list of preparatory work in your diary.
- Clear the area of old stumps, wild bushes, stones and other debris.
- Plow the area deeply or dig over the layer.
- Water to encourage weed emergence. Carry out deep cultivation according to the seedlings and level the area.
- At the same time, take the soil to the nearest chemical laboratory to determine the physical condition and type of soil, its chemical composition. This is necessary for subsequent garden care: applying fertilizers, watering, and other agrotechnical measures.
- Based on the results of the analysis (according to the recommendations), apply the recommended doses of fertilizers and other reclamation components for the final autumn treatment. Without such data, it is not advisable to fertilize the site. It is better to add fertilizers and other components directly into the planting hole (mineral fertilizers, humus or vermicompost, slaked lime, biological products for pests and diseases).
Determining the soil on the site
Depending on the mechanical composition, soils are distinguished: clayey, silty loams, sandy loams, sandy loams, sandy loams, etc.
Light soils generally contain less nutrients than heavy soils. The effect of mineral fertilizers is enhanced on lighter soils.
Soil analysis is done by agrochemical laboratories at MTS.
On a personal plot, the mechanical composition of the soil can be approximately determined using the table below. Soil determination table
| Soils | The sensation of rubbing soil between the fingers and the action of a knife | View through a magnifying glass | Rolling a cord from moistened soil |
| Clayey | Fine homogeneous powder. The grains of coarse sand do not scratch the skin of your fingers. When cutting with a penknife, you can’t hear the crunch of sand particles | There are no large sand grains | They give you a long cord |
| Silty loams (based on the amount of silt they are divided into light, medium and heavy) | When cut with a knife, it gives a smooth surface. | A small amount of sand | They don't give you a long cord |
| Sandy loams (based on sand content can be light, medium and heavy) | When rubbed, a large amount of sand is clearly visible. The knife makes a characteristic creaking sound | — | They provide a very fragile cord (it crumbles) |
| Sandy loam | Sandy particles predominate with a small admixture of clayey | Can't roll up the cord | |
| Sandy | Composed almost exclusively of sand grains |
Zoning when planning garden and berry plantings
On a separate sheet of garden diary, draw a diagram of the layout of the garden. The garden can be located at the front, side or rear of the house, but trees and bushes should be positioned north to south for best light and have three zones. They can be located one after the other or divided into three separate sections located at different ends of the total area of the dacha.
- If the zoning is joint, then a vegetable garden is planted in the first zone, the plants of which will not shade the crops of the second zone, and in the morning they will receive their share of the sun.
- It is better to place berry gardens in the second zone. Their height is up to 1.5 meters. The morning shadow from the bushes will not harm the plants of the third zone.
- The orchard itself will be planted in the third zone. It should be at a distance of 2.5-3.0 m from neighbors so as not to shade their area.
On the pages of your garden diary, write down the names and brief descriptions of fruit and berry crops, and in the diagram indicate their location on the plot area under numbers.
Plan your future garden so that the plants do not interfere with each other and do not block the light. © pickleshlee
Regular pruning
The most important stage in preparing a garden for winter is pruning fruit trees, which must be carried out in dry weather and always before the onset of persistent frosts. Remember: the air temperature during pruning of fruit trees should not fall below –10°C.
First of all, trees need to be cleared of dry, broken and diseased branches. It is also advisable to cut out branches growing inside the crown. When pruning shoots, remember: the cut should be even, as smooth as possible, and there should be no bark marks on it. The sections must be thoroughly cleaned, treated with a solution of copper sulfate (1 tsp per 1 liter of water), and then coated with garden varnish.
Pruning can also be done in the spring, when the wood has already thawed and the active movement of sap in the tissues of the plant has not yet begun. When the tree begins to bear fruit, it will be possible to do more severe pruning, cutting out and shortening branches. This measure will increase the yield of the tree.
Layout of berry gardens
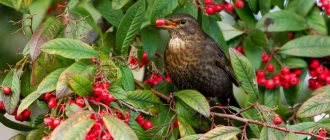
When laying out the berry garden on the diagram, immediately take into account the nature of the plants. So, black currant grows calmly surrounded by other neighbors, but sea buckthorn and viburnum are quite unfriendly with their neighbors. Therefore, they are planted separately. Sea buckthorn can be used as a green hedge, and viburnum and hawthorn can be used in landscape decoration of a recreation area. In solitary plantings of mowed lawns, they look great.
Some owners believe that it is generally better to place berry gardens along the borders of the plot. In this case, part of the land is freed up for other crops or areas (recreation, sports, etc.). Such planning is suitable if the site is not fenced with a green hedge or the berry bushes themselves can serve this purpose with their characteristics (prickly, dense, etc.).
The density of berry plantings is very important. It is a natural regulator of the optimal development of plants, their resistance to diseases and crop formation.
- Raspberries are planted in dense rows, 0.5 m apart and 1.0-1.5 meters between rows. As the raspberries grow, they occupy the row-spacings; the former row-spacings are cleared of raspberries and become temporary paths. By pruning the shoots, the crop is swapped, returning it to its original place after 2-4 years.
- Yoshta, black and golden currants are planted at a distance between bushes of at least 1.5 m, and red currants every meter. Large bushes will shade each other, and the thorns of certain gooseberry varieties will completely limit access to the berries. When used as a green hedge, honeysuckle and shadberry are planted at intervals of 1.0-1.5 meters (or even thicker), and in a berry garden at a distance of up to 2 meters.
The number of certain berry bushes is very important. Think about it and plan in advance on the diagram the quantity of each type and variety so that you can provide your family with fresh berries and make preparations for the winter. For a family of 4-5 people, 20 raspberry bushes, 3-4 bushes of all types of currants and gooseberries, joshta, serviceberry and honeysuckle will be enough. Leave some room for exotic newcomers who will appear on your radar over time. A properly planned berry garden grows normally and bears fruit within 7-12 years, and then gradually rejuvenates or the bushes are moved to another place.
Planting berry bushes. © Thomas Generazio
Setting up an orchard
On the next free page of your garden diary, draw a diagram of the placement of fruit crops. Conditionally allocate 4 square meters for each crop. m of total area for one tree. Do not thicken the plantings. The trees will grow and begin to interfere with, or even oppress, each other. Planting holes should be located in a row at a distance of 4.0-4.5 m. Leave row spacing of at least 2.5-3.0 m. Pay attention to the types of crops. Thus, today most farms are switching to columnar forms of apple and pear trees - the main garden crops in dacha farming. In terms of habit, these species are much smaller, and the yield is almost equal to tall crops. Columnar forms are easier to care for, they are resistant to disease, and are less damaged by frost.
For an average family, 1-2 trees of each type are enough. There should be early, mid and late varieties in the garden in order to have fresh fruit throughout the warm season and also prepare processed ones for the winter. As for garden crops, it is enough to have 2 cherries (early and late). Instead of a medium cherry tree, plant 2 cherries. They form a harvest after early cherries. You need 1 quince (later you can graft another species or other varieties on it), 2-3 plums, including one marabelle.
1-2 apricots of frost-resistant varieties are enough. 2-3 apple trees, which over time, through grafting, can be turned into 6-8 varieties of different ripening periods. Don't forget to leave room for exotics. Be sure to plant the nut separately. Almost nothing grows under the canopy of this crop. If you love hazel, set aside the first row for it so that taller trees do not deprive it of the sun with their shadow. 11-12 fruit trees will eventually turn into 18-20 varieties of all types.
In order for the garden to serve for a long time and not get sick, it is necessary to use zoned varieties. They are more resistant to diseases, pests, weather changes, and bear fruit longer. You can get acquainted with the varieties and varieties for your region, down to the region, and their characteristics in catalogs and other literature. When buying seedlings, be sure to contact specialists. Remember! A garden planted with low-quality seedlings will add work and care, but will not please you with the harvest and quality of fruits.
Harvest ripening time
This parameter determines how soon you can harvest. Experienced gardeners rely on early and mid-early varieties that have time to ripen in the middle climate. But you shouldn’t completely abandon late-ripening varieties, thanks to which you will extend the harvest period and provide your family with fresh fruit for a long time.
- TOP 9 most delicious winter apples (with photos)
Late apples, as they say, “come with a surprise” - they acquire optimal taste several weeks and even months after harvest.
- Winter pears - the most productive varieties (photos and descriptions)
Do you want to enjoy juicy and sweet pears all year round? Be sure to plant a winter pear in your garden!
The main thing is not to chase super-yields. Be prepared for the fact that trees bear fruit cyclically. And if one year you get a rich harvest, the next season may turn out to be more than modest.
General approaches to planting a garden
Plant a garden in the fall, that is, dig planting holes according to your plan, prepare near each one the fertilizer mixture that is necessary due to the condition of the soil.
Preparing the planting hole
In the fall, you can prepare a planting hole of only approximate dimensions, since the final version will be determined by the size of the root system, depending on the age of the purchased seedling. The preliminary size of the planting hole is approximately 60x60 for 2-year-old seedlings; for 3-year-old seedlings it can be increased to 70x80 cm and finalized when planting the seedling in the hole.
Preparing the soil mixture
Near each hole, mix the top layer of soil with humus and peat. In the spring, before planting a seedling, add a glass of wood ash and slaked lime and 200 g of nitrophosphate to this mixture. Mix well.
It is best to purchase seedlings of fruit trees and berry bushes from trusted producers. © mainetoday
Purchase and preparation of seedlings
It is best to plant seedlings in the spring. During the growing season, the seedlings will grow stronger and the root system will strengthen. During the warm spring-summer-autumn period, the young tree adapts to its new location.
Do not rush to buy seedlings from individual unfamiliar sellers, especially along the roads leading to the dacha. It is better to purchase seedlings from farms that grow them or from nurseries. There is more confidence here that you will acquire the desired zoned variety of the garden or berry crop you need.
Carefully inspect the selected seedling. If you find dried roots, a crooked stem, cracks in the bark or drops of gum, refuse to purchase. Remember! No amount of assurance from the seller will return lost time.
Rules for planting seedlings
1-2 days before planting, soak the seedlings in rootstock or other growth stimulant. Prepare a container of clay mash with the addition of root, planriz or phytosporin. Other biofungicides suitable for tank mixes can be used.
About 2-3 weeks before planting the seedlings, pour part of the soil mixture into a hole in a cone. During this week, the cone will settle, and the planted seedling will be correctly placed in the hole. Dip the prepared seedling into the mash, insert it into the hole, straightening the root along the cone so that there are no upward creases, and fill 2/3 of the hole with soil mixture. Fill the bucket with water. After soaking, fill in the rest of the potting mix or soil. Drive a stake and secure the seedling with a figure eight to the support. A loose seedling, swaying under gusts of wind, will tear off small roots that provide a connection between the plant and the soil.
How to choose apple tree seedlings
It is difficult to imagine a garden without apple trees, but choosing their seedlings is not always easy. It is better to purchase annual specimens (without branches), they will be cheaper than biennials (with 2-3 branches) and will take root faster. Do not buy just one seedling; remember that a cultivated apple tree needs pollinators. If the variety is self-pollinating, then the presence of other trees of the same species nearby will still have a good effect on the yield.
- Planting an apple tree: how to plant a seedling correctly in autumn and spring (photo, video)
Everything you need to know about “proper” planting of an apple tree.
Important landing nuances
When planting, be sure to ensure the correct depth of the root collar. If it is buried, the tree may dry out for no reason after 5-10 years (especially on heavy soils). On light sandy loam soils (especially in the south), it is better to bury the root collar somewhat deeper into the soil (8-10 cm), “hiding” it from the upper drying layer. In seedlings that form adventitious roots or shoots (figs, currants, plums, apple trees), deepening does not interfere with the normal development of the tree. Seedlings of these crops quickly rebuild their root system, often on insufficiently moist soils.
For self-rooted seedlings, the root collar should be located at the level of the planting hole or 2-3 cm higher (no more). In grafted seedlings, the grafting site is located 4-8 cm above the root collar. Beginning gardeners often confuse the root collar and grafting and plant deep down to the grafting site. In this case, the root collar is deeply buried in the soil and the tree dies early.
If you have correctly identified the root collar and planted the seedling so that it rises 4-5 cm above the soil, then the tree is planted correctly. Compact the soil around the planting. At a distance from the trunk with a radius of 30-50 cm, make a roller 5-7 cm high and fill in another 2-3 buckets of water. Along with the absorbed water, the seedling will also be drawn into the soil. Make sure that the root collar remains 2-3 cm above the soil. If necessary, add soil after watering and mulch with a small layer of fine mulch (peat or humus, sawdust). If you bought live seedlings and planted them correctly, in 2-3 weeks your garden will turn green with the first young leaves.
Apple trees on trellises. © starkbros
How to determine the root collar
- For a young seedling, use a wet cloth to thoroughly wipe the lower part of the trunk and the beginning of the root. The root collar is defined as a transition from greenish color (trunk) to light brown (root zone).
- For older seedlings (3-4 years old), wipe the lower part of the trunk with a wet rag and, after the wet area has dried, carefully scrape off the bark with a knife at the site of the subtle expansion of the trunk into the root. If at the site of expansion the scraped-off color of the young subcortical layer is green, then it is the stem, and if it is yellowish, then it is the root zone. The place where one color changes to another is the root collar.
- In some seedlings, the place where the upper lateral roots originate from the trunk is clearly visible. This is the root collar. The origin of the roots should remain above the level of the planting hole.
What not to do when planting seedlings
- When planting, you cannot use half-rotted manure, only humus mixed with soil.
- You should not frequently water seedlings with small amounts of water. They only dry out the soil in the planting hole.
- Do not water seedlings with cold water (from an artesian).
- It is impossible to fertilize plants in the first year after planting, especially with nitrogen fertilizers.
- After planting, you cannot mulch the tree trunk circle with a large layer of mulch. In the event of prolonged rains, water accumulated in the mulch will cause damping off of the young bark and the death of the plant. A thick layer of mulch is applied in the fall, which will protect the soil from freezing and the death of seedlings from low temperatures.
When to plant fruit crops
In spring, seedlings with an open root system can be planted before the period of active sap flow. In each region it begins at different times, but on average - from April 20 to May 15. Seedlings with ZKS can be planted at any time; if this is a real ZKS, then the plants will not even notice such transshipment.
viktor50
I bought two-year-old apple trees in buckets at the nursery in June, planted them, last year we tried the first apple trees, now they are more than two meters in height. And with OKS I planted it in May, the seedlings already had leaves, but if they were freshly picked (the foliage is not withered), then they are accepted normally, but in the first year you need to make sure that the soil does not dry out.