When to dig up tulips
Large beautiful flowers will delight you if you dig up their bulbs after flowering. When to dig up tulip bulbs, their leaves will tell you.
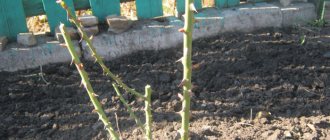
Tulips in the garden
Important! If you leave flowers in the ground, they will deepen, and next year flowering may be delayed, the flowers themselves will become smaller.
You should dig up planting material when the flowers have faded, but do not wait for the foliage to completely wither, then it will be difficult to understand their location.
What to do with the bulbs after drying
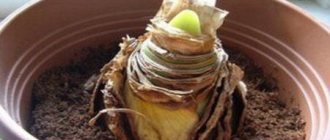
After final drying, the seed is prepared for sorting and storage:
- Each tuber is inspected, dry, easily separated scales are removed.
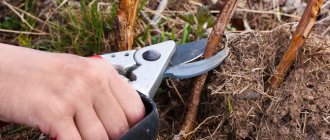
- The above-ground part is carefully cut with pruning shears or small garden shears, but not too deep, so as not to damage the root.
- Disinfect for 30 minutes in a pale pink manganese solution and dry.
What to do when the tulips have bloomed
When to dig up hyacinths after flowering
If the flowers begin to fade, their foliage turns yellow after a while. The tulips have faded, the above-ground part of the plant will tell you what to do next with them. The leaves should be almost completely yellow, but not brittle, flexible enough and firmly attached to the bulbs.
Important! Do not wait until all the leaves wither and dry out. Then the location of the bulbs will become unknown, and they can be damaged when digging them up.
Beautiful flower bed
After digging, the tulips must be prepared and put away in a suitable place, for example, brought into the house or basement. If you complete all the steps on time and correctly, the planting material will be preserved until autumn and will delight you with beautiful flowering in the future.
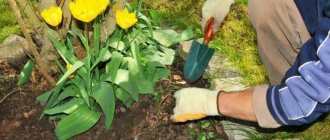
Tulips require care after flowering in open ground. It is better to dig them up on a warm, clear day. It is best to use a pitchfork or a narrow shovel. In the southern regions of Russia, the procedure can be performed as early as early June, in the northern regions and in the middle zone - at the beginning of July.
You should not do this too early, they will not be stored well, and next year the plant will become less resistant to disease, the flowers will crush it. If this procedure is performed too late, the children will begin to separate from the mother bulb and may be damaged or even lost in the soil.
Diseases, quality determination
The quality of flowers is determined by their appearance:
- The leaves are a juicy, bright green color.
- The stem is quite thick, up to 1 cm in diameter.
- The tip of the stem closer to the cut is white.
- Stem length is 40-60 cm (if less, then the tulip variety is low).
- The bud is closed.
- The bulbs are without flaws, hard, brown husk.
If the leaves have gray or yellow spots, then the plant is affected by a fungus (gray rot). This is caused by keeping the flower in the cold coupled with dampness. Damaged leaves must be eliminated, because... if the stem is damaged, the tulip will die.
Watery bulbs with a pink spot is a soft rot that will sooner or later lead to the flower wilting. The reason is planting in warm soil (above +12 °C). If a lesion is detected, it is necessary to disinfect the soil with a fungicide or renew it, and also be sure to drain it.
In addition to these diseases, there are: fusarium, typhullosis, root rot, penicillosis, trichoderma, August disease - the fight against each of them comes down to maintaining optimal growing conditions, excluding contaminated elements, treating and disinfecting tools with formaldehyde, and beds and bulbs with potassium permanganate and fungicide .
Why dig up flowers in summer?
When to plant tulips
If you leave the bulbs in the ground over the summer, they may suffer from excessive heat or heavy rain. This will entail irreversible consequences: tulips may go deeper into the ground, get sick, or stop blooming altogether.
Tulip bulbs
Important! In a dry and not too hot climate, you can not disturb the bulbs for 1-2 years, only checking the planting depth, while fringed species cannot be left in the soil even for one summer.
Possible storage problems and their solutions
If the necessary storage conditions are violated, the tulip tubers will show this.
If the bulbs become wrinkled and soft, the plants are signaling an insufficient level of humidity. Place a wide container of water close to the container where the roots are stored. As it evaporates, add liquid.
Another “resuscitation” option is to purchase a household air humidifier with a humidity level sensor. When the set value is reached, the device turns off. The main thing is not to forget to fill the container with water.
On a note!
If the tulip bulbs are wrinkled, do not rush to throw them away immediately. Try raising the humidity in the room where the planting material is stored. If the efforts are effective, the roots will regain their former elasticity.
When the room is too humid, rot and sores begin to develop on the surface of the tubers. Drops of water appear on the skin - a signal that the room urgently needs to be dried. Household electric heaters will help.
With diseased bulbs proceed as follows:
- Those that are completely or half rotten are destroyed.
- If the root is damaged up to 1/3, the rotten part is cut off. The cut site is treated with green diamond. These seeds are subsequently stored separately from healthy bulbs.
- Suspicious: soft or slippery roots are wiped with a clean, dry cloth and also placed in another container.
How to prepare bulbs for storage
When to replant tulips
When digging tulips, you should keep the tools perpendicular to the ground, otherwise there is a risk of damaging the planting material. They must be removed from the ground together with a lump of earth, after which it must be shaken off.
Large children should be separated from the bulb, leaving the small ones so that they can grow up. After this, the tulips should be placed in boxes (preferably wooden):
- immediately take it outside and ventilate it, if the weather is rainy, then leave it to dry indoors;
- remove excess dirt and husks;
- rinse them with a salt solution (1 liter of water and 1 tablespoon of salt);
- Place in layers in boxes, lining each row with newspaper.
Bulbs should be stored in a dark place; a dry basement is ideal. Good ventilation and disinfection of the room will help. For storage, the temperature should be maintained at a level of up to 25 0C, humidity - no more than 60%. You can protect the bulbs from mold and rot by ventilating the selected room twice a week for 3 hours.
A diseased onion, this one should be thrown away
Closer to autumn, the temperature should be gradually reduced to 16 0C, while the ventilation time will be reduced. Under such conditions, foliage buds and buds are formed. You should also regularly check the bulbs for damage and rotting. Such specimens should be immediately removed away from others.
Tips and tricks for proper storage
- The fundamental conservation recommendation for both tulips and their bulbs is compliance with temperature conditions, air humidity, and room ventilation.
- Elimination of sudden changes in environmental parameters.
- The sun is the enemy of cut tulips, but so is temperature below 0°C.
- The use of disinfectants when forcing and storing tulips has a positive effect on the result.
- Tulips love to be treated with care (without strong, tight packaging and dense materials).
- It should not be allowed to be adjacent to any other flowers and in no case to fruits.
Digging procedure
Having chosen a dry, warm day, you can dig up tulips. When working, it is better to focus on dry foliage and carefully remove the bulbs along with a lump of earth.
Important! You should carefully remove the bulbs so that the little children dig everything up and do not get lost in the ground.
If it rains, you should wait a few days until the ground dries out before digging. Having taken the bulbs out of the ground, they should be left outside in the sun for a couple of hours so that the soil on the roots becomes completely dry. After this, they are cleaned and stored in a prepared place.
Regular checking of seed
Primary processing before storage is often not enough. All bulbs must be periodically turned over and inspected for the appearance of new spots and rottenness. Damaged roots are immediately removed, and those adjacent to them are wiped with a clean cloth and placed in a separate box to avoid further spread of bacteria.
Caring for tulips after flowering
Once the plants have finished flowering, some care will be required before the bulbs need to be dug up. There are many questions about whether to trim the leaves and how to water afterwards.
When to prune tulips
Towards the end of flowering, watering and fertilizers should be kept to a minimum. But premature pruning will be dangerous and can also lead to a complete lack of flowering in tulips.
Completely wilted leaves should be trimmed off. As a rule, this procedure is carried out just before digging up the bulbs. Plants must receive the maximum amount of nutrients and ripen; in tulips, this process occurs through green leaves.
Important! The deadline for pruning a tulip occurs 15 days after the tulip has bloomed.
Another important point is that after pruning, you should mark the location of the bulbs so as not to damage them later and know the exact location. This whole procedure is a rather lengthy process, which involves gradually cutting off the above-ground parts of the flowers as they are ready.
Should I pick a flower?
Flower growers say that the peduncle should be cut a week after flowering. This will help keep the plant strong, save more nutrients and produce stronger and healthier seeds.
Interesting. When the tulip has faded, under no circumstances should its foliage be cut off. This can cause the death of the plant. It is recommended to remove only the peduncle, which will ensure an increase in nutrients in the seed box.
Planting tulips
If a flower is cut for a bouquet, then it is worth cutting it with a couple of leaves. In other cases, the foliage is cut off only after drying.
Factors contributing to the preservation of tulips
We correctly figured out how to store tulips at home after cutting. There are a number of factors that directly determine how long flowers will retain their freshness; special attention should be paid to this. There are several important points that will directly determine the lifespan of flowers cut from a flower bed.
Time to cut
The shelf life of tulips largely depends on what time of day the cutting was made. Experienced flower growers recommend carrying out the procedure early in the morning, before daily watering, while the buds have not yet opened. By the middle of the day the sun will cause the flowers to open; if cut, they will not be able to stand for long.
Cloudy weather contributes to a longer period for cutting; without sunshine, the procedure can be carried out at any convenient time.
How to prevent rotting
The most dangerous enemy of any plant is rot; bacteria of this type quickly destroy the plant. It is possible to protect cut tulips from such a misfortune using several methods. How to keep tulips in a vase longer? Apply the recommendations:
- It is necessary to regularly change the water in the container; this must be done once a day. At the same time, the walls and bottom are thoroughly washed.
- The lower leaves must be removed; constant exposure to water will accelerate the putrefactive processes in the plant tissues.
- A few drops of potassium permanganate solution or a piece of activated carbon will help prevent rotting.
- A tablespoon of food vinegar for every liter of water used will not allow harmful bacteria to develop.
- An aspirin tablet has the same effect as vinegar. The solution is made at the rate of one tablet per liter of water.
Such simple tricks will help you avoid troubles in the form of rot on the stems.
What don't tulips like?
In addition to the points described above, there are some nuances due to which cut flowers can quickly fade. It is worth remembering that tulips are not liked:
- Direct sunlight is harmful to them. When choosing a place for a vase, preference is given to well-lit, but without direct sunlight. Its rays often leave burns on the stems, leaves and petals of the trunk, shortening the duration of flowering.
- When forming a bouquet or simply placing containers with flowers, you must respect the proximity. Tulips are best preserved in splendid isolation; additions to them in the form of daffodils, lilies of the valley, lilacs, and roses will significantly shorten the life of the entire bouquet.
Interesting! Recently, compositions of flowers with rhizomes have come into fashion. How to store tulip bulbs before this? It is best to immerse them in a vase with water; this is how the composition will be preserved later.
Timing for digging tulip bulbs
Flowering times vary depending on the region and variety. Therefore, it is possible to determine exactly when to remove the bulbs from the ground only by the time when flowering has ended. This process begins no earlier than a month after flowering. You should also not keep tulip bulbs in the ground longer than 1.5 months after full ripening.
Important! Digging up bulbs is useful, the main thing is that it helps to grow large and beautiful flowers.
Growing tulips in Belarus and the Moscow region differs little; in the Urals and Siberia the timing will be completely different. In Kuban the period will be earlier than in other regions.
Planting in the garden
The next step after the tulips have bloomed is preparing for planting. Let’s find out what to do next, what work is to be done on the site?
Flowers are planted at the end of August or September. The timing depends on the region and the possibility of frost. For example, in the Moscow region it may be the beginning of October. Before the cold weather, the bulbs should have time to grow the root system, but not produce stems and leaves.
Note!
The longer tulips are in the ground before winter, the greater the percentage of their rotting and fungal diseases.
The landing conditions and actions are as follows:
- Choose sunny and sheltered places from the wind.
- The soil should be loose and permeable. If moisture lingers, the bulbs can become saturated with water and freeze even in mild frosts. Planting in raised flower beds is possible. The fertile layer must be at least 50 cm.
- You can do a soil test to measure the pH. Neutrality should not exceed 7.0, otherwise lime will have to be added to the soil. If there are no special tools, you can determine the indicators yourself using available materials. You need to take currant leaves, pour boiling water over them, and let them brew. Remove and add some soil to the solution. If there is a lot of acid in the soil, the solution will turn red, if it is alkaline, it will turn blue, and if it is neutral, it will turn green.
- Organic fertilizers are added to the soil: mullein, compost, peat. You can use a special mixture for bulbs. You must carefully read the instructions, which indicate how much to use.
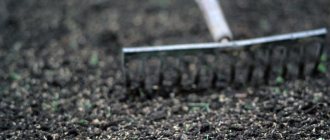
- All actions with the soil are carried out in July: digging, weeding or clearing the area of weeds with the help of Tornado.
- The planting temperature is about 10 degrees, since the beginning of the growing season occurs around this weather.
- The bulbs are dipped in a manganese solution, kept there for no more than two hours, and planted immediately.
- The soil is also well watered, adding antibacterial drugs.
- Planted to a depth of three bulbs, that is, for small ones (2 cm) the depth is 6 cm, for 7 cm - 20, and so on. 0.1 m is left between the corms, and 0.3 m between the rows. Up to 50 bulbs are planted per approximately 1 square meter.
- Holes can be made with a special scoop.
- For new bulbs, a separate “school” is created for growing, which will happen next season. Such plantings will not bloom; they will only increase the size of the bulbs.
- Add ash to the holes, then fill them up.
- The flower beds are covered with a layer of mulch; sawdust, agrospan, and other materials are used as mulch.
Advice!
For planting, you can use baskets for bulbs. They pour soil into them, place the tulips bottom down, then bury them in the ground. These containers are now sold in various sizes and types. From their combinations you can create interesting flower beds.
How and for how long to store planting material
The bulbs must be stored in a special place where the required temperature, humidity and low lighting must be maintained. The room should be well ventilated or regularly ventilated.
For about 2 months, you should maintain the temperature no higher than 25 0C, then gradually reduce it to 15 degrees. This care helps to form a flower bud in the tulip bulb.
Attention! It is worth regularly sorting through the bulbs, removing bad and rotten ones, and simply moving them.
Where are the bulbs stored?
Before digging up and storing the bulbs, you need to decide where exactly to store them. There will be no trouble with those bulbs that will be planted in the fall. They are stored at a temperature of plus twenty-five degrees, poured into a box. They don't need special conditions.
If the bulbs need to be planted in the spring, then it is necessary to create certain conditions for them. The bulbs need a dry, ventilated room with an air temperature of fifteen degrees. In this case, the temperature must be lowered gradually, simulating natural conditions.
You can store the bulbs on the bottom shelf of the refrigerator, but after such storage not all varieties of tulips bloom. Most grow only leaves. A cold pantry, warm balcony, basement or cellar are good places to store bulbs until spring.
The ideal option is a dry underground floor, the temperature in which does not fall below ten degrees Celsius. True, this option sounds like a mockery for most summer residents living in apartment buildings.
If finances allow, you can purchase a thermal chamber for storing flower bulbs. After determining the storage location, you can begin digging up the bulbs and preparing them for winter storage.
When and how to plant tulips in autumn
Interesting. Tulips are planted in the fall, then in the spring you can admire their incredible blooms and enjoy the aroma.
October is suitable for planting in the ground; in colder regions this should be done in September. It is important for the bulbs to establish themselves during a period of warmth, this will help them establish themselves, which will ensure a warm winter and bright blooms in the spring.
Tulips in a bouquet
The soil temperature should not be higher than 10 0C. When planting later, you should cover the tulips so that they have time to take root. If the ground has not cooled enough, rooting will take place more slowly, and the bulb may be affected by pests and diseases.
Interesting. Both early planting of tulip bulbs and late planting are harmful. In the first case, there is a risk of disease, in the second, the plant will not have time to develop before frost.
For tulips, you should choose sunny, windless areas; you will need light sandy soil. To improve the condition of the soil, you can add compost or peat. Each hole should have drainage at the bottom, and the soil should be dug at least 30 cm deep to saturate it with oxygen.
Interesting. Tulips are very fond of various types of fertilizers, but when planting, you should use only complex fertilizer for bulbous plants.
The landing process is as follows:
- make furrows 15 cm deep;
- spill them with water;
- Next, you should feed the plant;
- lay out the bulbs at a distance of 10 cm;
- sprinkle with ash and sand;
- then cover with soil.
It is best to plant tulips in the same place only after 4 years.
Sometimes an urgent transplant is required in the spring. For example, if you need to plant other flowers in this place. You can replant tulips, but it is advisable to do this before flowering. Caring for tulips is simple, the main thing is to do all the steps correctly.
Storage Secrets
- It is worth digging out plant bulbs carefully so as not to damage them and avoid fungal diseases;
- cardboard boxes are not suitable, there is a high risk of getting wet, and the bulbs will rot;
- it is better to use a regular box: wooden or plastic;
- should be scattered in one layer to avoid damage to the bulbs;
- you can sprinkle the plants with sawdust, which will remove excess moisture;
- Another option is this: wrap each tulip bulb in newspaper, avoiding damage;
- in a private house, you can simply scatter it in the basement, but periodically check the temperature in the room.
Inspect tulip bulbs periodically during winter storage. If there is any damage, throw away the diseased specimens. This will reduce future loss of flower harvest.
If the damage is minimal, you can do the following:
- remove the identified mold and sprinkle the damaged area with crushed coal;
- Carefully remove pockets of rot using a disinfected knife, and treat healthy tissue with brilliant green.
Ways to store tulip bulbs until spring
If flower bulbs will be stored in an apartment, then you need to choose a cool room: a pantry or a cool room. The root vegetable should be kept away from batteries. If the balcony is insulated, then the box can be placed there. In the container with tulip bulbs, make a hole for a thermometer to control the temperature.
Popular: What to do if the leaves of the calathea begin to turn yellow
Second option: tulip bulbs are stored in a private house, then a basement is suitable for this. The cellar should have good air circulation and moderate humidity. Root vegetables are sprinkled with sand, sawdust or special minerals. To keep flowers longer, the soil should be pre-steamed (for an hour) using a water bath.
Plant the bulbs in steamed soil; the tulips will take root, but will not grow at low temperatures. Check the room temperature approximately once a month. Keeping them in the basement is a great way to preserve your favorite flowers, but there is also a disadvantage - small rodents.
If they are present indoors, then it is worth considering a different maintenance option or hanging the bulbs from the ceiling in old stockings or nets.
A thermal chamber is suitable for storing root vegetables. It automatically maintains temperature and is ventilated. Unfortunately, not everyone can afford such a device due to its cost. But you can make a heat camera at home; fortunately, there is quite a lot of information on the Internet.
A good option for storing a small amount of tulip bulbs is a regular refrigerator. In this case, wrap the root vegetables individually in paper, then place them in fabric or paper bags. But this does not apply to some varieties. Plants may sprout, but the bulk will delight only with green leaves.
Another way to store bulbs is in boxes. On the sides of the box, make small slits for a thermometer for subsequent temperature measurement. You can store it both on the balcony and in the apartment. Experienced gardeners plant plants for wintering in special “planting baskets.”
Then the problem of planting and transporting bulbs is much easier to solve. You can also use wet germination. This storage differs from others in that the tulip bulbs are placed in a plastic container containing wet sawdust or high peat.
How to properly store root vegetables in peat? The box is filled with an even layer of peat about ten centimeters, and the bulbs are placed there. Then cover them with a 12-centimeter layer and you can also lay a row of flowers. The advantage of peat storage is that you can plant several layers of bulbs at a sufficient distance, which will not prevent them from breathing.
Popular: How to recognize and protect rotting orchid roots
Storage is possible at temperatures from 3 to 5 ° and air humidity from 40 to 45%. You can also plant tulip bulbs in the fall before the first frost. Tulips that are planted in the fall grow faster and begin to bloom earlier, but if the soil is insufficiently insulated, they can also die;
Many gardeners prefer not to dig up ordinary varieties of tulips from the ground. But for better flowering, once every 2 - 3 years it is still worth removing them from the soil for renewal and healing.
Landing according to the drawing
In order for tulips to bloom beautifully and show all their properties, it is important to know what you can do with them next. Many gardeners, in order to amaze their friends with their magnificent flower gardens, plant bulbs in a certain pattern, for example, in the shape of a heart or letters.
In this case, the outline of the pattern is first marked with pegs. Then, at the planting site, remove all the top soil and dig up the soil onto the bayonet of a shovel. Add humus and fertilizers and make furrows as indicated above, then water.
Now you know what to do next when the tulips have bloomed and when to dig them up. Our tips will help you create a wonderful flower garden on your property that will delight you in the spring.