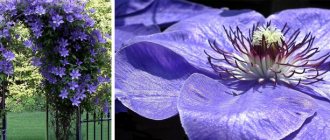
There is an opinion among flower growers that the rose is the queen of the garden, and clematis is the king. Looking at its luxurious and bright flowers, it’s hard to disagree with this, isn’t it? The plant is also called “Clematosis”, “Knyazhiki”. Reproduction of clematis is possible in several ways: cuttings, seeds, layering, dividing the bush. Large-flowered species can only be propagated vegetatively; seed propagation is suitable only for small-flowered species. It is very easy to plant a perennial climbing plant; if you want to please yourself with a new flower or expand your flower “plantation,” I advise you to pay attention to this crop.
Is it possible to plant clematis
Growing clematis is not that difficult - the procedures for caring for these flowers are very basic. The main thing when growing clematis is to follow the recommended planting dates, take into account the soil type and select the correct variety. For example, for regions with particularly harsh winters, it is recommended to choose winter-hardy varieties adapted to low temperatures.
Whether or not to plant clematis in open ground in a garden plot also depends on the level of groundwater. These flowers do not take root well in places where groundwater is located too close to the surface of the earth. The reason for this is the very long roots of clematis, which go to a depth of 1 m and will inevitably rot when planted in open ground in such areas.
Advice! In this case, flowers are planted on an artificial hill.
It is not recommended to plant clematis even if the soil in the garden plot is heavy, salty or too acidic.
Why doesn't clematis bloom and what to do about it?
The most common reasons for the lack of clematis flowers:
- bare root collar (clematis planting should be deep enough; it is important that the root collar is thoroughly mulched for the winter);
- high acidity of the soil (most varieties prefer a slightly alkaline reaction, so in the spring it is recommended to water each plant with a chalk solution - 1 tablespoon of chalk per 10 liters of water);
- metal support (in summer the metal heats up - high temperatures depress the plant);
- unsuitable place in the garden (clematis does not develop well with a lack of sun and poor drainage);
- improper pruning;
- soil pests - nematodes (the damaged plant is dug up along with the adjacent soil and disposed of);
- insufficient care and poor shelter for the winter.
To achieve spectacular flowering, the plant must be properly cared for and fed. For a comfortable winter at the end of August - beginning of September, superphosphate and any potassium fertilizer should be applied around the clematis bush (0.5 tbsp of each fertilizer is dissolved in 10 liters of water).
Popular clematis Nelly Moser
Classification of clematis
Clematis are divided into categories according to different characteristics. The most popular classifications are:
- By flower size: small-flowered (flower diameter from 5 to 7 cm) and large-flowered (from 15 to 20 cm).
- By flowering time: early flowering and late flowering.
- By type of pruning: 1st group blooms on last year’s shoots - it is not pruned before winter; The 2nd group blooms both on the shoots of last year and the current one - representatives of this group are pruned twice (in the summer - last year's branches, in the fall - new shoots); The 3rd group produces flowers only on shoots that ripen this year - clematis of this group are pruned in the fall, and the cut is made close to the ground. It is produced in the fall almost close to the ground.
The most convenient classification of clematis by size is considered.
How to plant clematis correctly
Clematis cannot be called a capricious garden crop - caring for them is not difficult, however, planting and growing them involves a number of rules, ignoring which can lead to the fact that the flowers may not take root and may die. It is especially important to correctly select and prepare a place for planting these plants in open ground.
Conditions for planting clematis
The procedure for planting clematis, regardless of the method of propagation (by seeds, cuttings or dividing the bush), looks approximately the same:
- In the area chosen for planting, planting holes are dug, the depth of which should be at least 50 cm and the diameter about 60 cm. Depending on the composition of the soil, the size of the hole may vary. For example, on poor soils, a larger hole is made so that a layer of fertilizer can be placed in it.
- If the groundwater in the garden plot is too high, drainage must be laid at the bottom of the hole (most often it is broken brick).
- A mixture of humus and sand is placed on the drainage. For better flowering of clematis, you can add superphosphate to this soil mixture.
- Before planting the seedling, a small hill is formed from the resulting mixture, next to which a small peg is installed - the future support.
- The roots of the plant are evenly laid out on the mound of soil mixture.
- Then the root system of the seedling is sprinkled and pressed a little, compacting the soil. The root collar of clematis should be approximately 12 cm above ground level.
- The planting procedure ends with abundant watering, after which the tree trunk area is mulched with peat. This is done to ensure that moisture is retained in the soil for as long as possible.
Where is the best place to plant clematis?
Clematis grow best when placed in open ground in sunny areas without shade. It is equally important to have reliable protection from strong winds. To avoid stagnation of water, flowers are planted on a hill.
As for the composition of the soil, planting on permeable, slightly alkaline or neutral soil has a good effect on the development of this garden crop.
Important! Under no circumstances should this crop be placed on acidic soils.
How to plant clematis seeds at home
Only small-flowered clematis are usually propagated by seed. Large-flowered varieties should be propagated vegetatively.
The disadvantage of propagating clematis using seeds is the fact that they germinate at different times, which greatly complicates determining the timing of transplanting seedlings into open ground. In addition, the process of growing seedlings itself is greatly extended because of this.
When growing clematis from seeds, planting and caring for seedlings is as follows:
- 10 days before sowing the seeds, they must be soaked in plain water, without impurities. At the same time, it is important to drain the water every day or two and replace it with new one.
- The container selected for seedlings is filled with specialized soil from a gardening store or a soil mixture made independently (for this, peat, river sand and the top layer of soil from the site of future planting are mixed in equal parts).
- The soil is watered moderately and seeds are poured onto its surface. There is no need to deepen the planting material. It is enough to lightly cover it with a thin layer of sand.
- After sowing, the seedlings are covered with plastic film or glass.
Important! The container with seedlings is installed in a room with low air humidity. The temperature in the room should be at least +25°C.
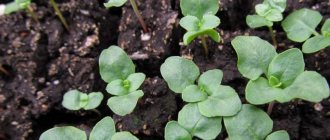
With the formation of the first 2-3 leaves, the seedlings are planted in separate containers. Before planting clematis in open ground, they are moved to a greenhouse for 2-3 years. Only then can the flowers be planted in a permanent place in open ground.
How to plant clematis in the first year of life
Stores sell clematis, as a rule, in two categories: last year's (annual) and two-year-old. The first group may raise doubts - the seedlings look very small and fragile, even painful, but this is not so. Clematis is a fairly hardy garden crop that is much stronger than it seems. In addition, the price of one-year-old seedlings is lower than that of two-year-old ones.
Before purchasing, you must carefully inspect the planting material. The seedlings should not have mechanical damage or rotten roots.
If the buds of the plants are not sufficiently developed and the length of the sprouts does not exceed 1.5 cm, the seedlings are put back into the packaging and sprinkled with vermiculite. Then the planting material is placed in a refrigerator or cellar with a temperature of a maximum of +5ºC until mid-March.
Seedlings with large shoots can be planted directly into a container, after which they are placed on the window. It is important to isolate the battery.
Important! For rooting, clematis need a temperature of +18 to +20ºС.
Procedure for planting first-year clematis in containers:
- Special containers with a volume of up to 2 liters with drainage holes or plastic bottles are used as containers. They are filled with universal soil with vermicompost from the store and mixed with 1 glass of vermiculite and 1 liter of high-moor peat. The container is filled so that a mound is formed from the soil.
- The roots of the seedling are spread over this mound, which are then covered with earth. The buds of the plant should be buried 1.5 cm, no more.
- After planting, the seedling is watered and mulched with vermiculite (layer thickness - 0.5 cm).
- Thin supports about 50 cm high are installed along the edges of the container.
- The upper ends of the supports are connected to form a cone. The growing shoots of clematis are subsequently distributed over it.
After planting, when caring for clematis, it is necessary to monitor the condition of the soil - it should not be too dry or too wet. It is also recommended to pinch the shoots above the 3rd pair of leaves for better ripening of the buds.
As soon as the temperature on the balcony or loggia at night reaches +5ºС, the containers are transferred there.
Important! In April-March, the glass on the balcony should be shaded to protect the flowers from bright sunlight.
In mid-May, containers with seedlings are buried on a hill in the garden. The bottom of the container is cut off and sand or fine gravel is poured under it. The top layer of soil is mulched with grass or compost, and a row of plastic bottles is placed around the container to protect against slugs and mole crickets.
Caring for seedlings is not much different from the previous stage: they are watered moderately, trying not to flood them, and pinched.
At the end of July, when the bushes have formed a full-fledged root system, they are transplanted to a permanent place in open ground. To do this, cut the container obliquely and remove the lower leaves of the seedlings.
Important! All clematis in the first year of planting must be pruned in the fall to 2-4 pairs of buds.
At what distance are clematis planted?
The distance between clematis when planting should be at least 1 m. It is important to place the bushes at some distance from the walls of houses and fences.
Care and cultivation of clematis
Growing clematis in the country requires simple but regular care, consisting mainly of basic procedures. The best flower development occurs when:
- regular moderate watering;
- periodic feeding;
- timely pruning;
- preparation for the winter.
Watering and fertilizing
When caring for this garden crop, the main thing is moderation. Water clematis at least once a week. In conditions of prolonged drought, watering is done more often so that the top layer of soil does not dry out. Dosage: approximately 35 liters of water per adult bush and 15 liters per young seedling.
Clematis in the first year of planting are fed sparingly. Then the intensity of fertilizers increases, especially during the period of foliage formation. To do this, use nitrogen-containing fertilizers, which help the flowers gain green mass.
With the beginning of flowering, flower care includes fertilizing with phosphorus fertilizers, which replace nitrogen fertilizers. In late autumn, mineral fertilizers are applied to the open ground.
Trimming and tying
The bushes must be tied up, and a support (wooden peg or metal pipe) must be installed at the planting stage. Subsequent burying of the support in the ground can damage the roots of the flowers.
The abundance of flowering depends on the correct formation of the bush, so caring for it involves periodic pruning. Depending on which group clematis belong to, they are pruned differently.
Varieties of the 1st pruning group undergo only partial formation during the summer. For the winter, flowers are not pruned at all.
After planting clematis of group 2, caring for them includes summer and autumn pruning. In summer, last year's shoots are removed, in autumn - branches of the current year. Without such pruning
Varieties of the 3rd group can be pruned several times a season for sanitary purposes, eliminating dried or damaged shoots, but in the fall the bush is cut off almost completely, as indicated in the diagram. Only stumps up to 20 cm long should remain.
For more information on how to properly prune clematis, see the following video:
Preparing for winter
Regardless of the region where clematis are grown, a mandatory part of caring for these flowers is covering the plantings for the winter. Before the onset of cold weather, the bushes are trimmed, removed from the support and laid on the ground. Then caring for the plants comes down to hilling them with sand or ash to a depth of 20 cm, if desired, and installing protection: dry spruce branches or plastic film, under which peat is placed. It can be replaced with sawdust.
You can learn more about planting clematis in open ground and subsequent care from the video below:
Clematis varieties that bloom in the first year of planting
The Jacqueman group is distinguished by long vines up to 4 m. Flowers with a diameter of 20 cm are lilac and purple. The best varieties: Rouge Cardinal, Bella, Star of India.
Integrifolia group varieties Mrs Cholmondeley, Purpurea Plena Elegans. The lashes are 2.5 meters long, the flowers are smaller.
Wincella has a special leaf structure. Flowers reach only 12 cm, but up to 100 of them are formed on one bush. Treat yourself to a red, pink or purple cloud from clematis varieties Ville de Lyon, Prince Charles, Ernest Markham.
Variety Ville de Lyon
Clematis with the longest flowering period
The record holder for the duration of flowering is the Countess de Boucho variety. The French scientist F. Morel gave the world a pink miracle. In June, the royal person begins to sing a melody, exuding a wonderful aroma. Flowering stops in September.
Countess de Bouchot
The lashes reach a height of 2 meters. It is better to choose partial shade for clematis so that the flowers retain their brightness and do not fade. In other groups of clematis there are varieties that differ in the duration of flowering, but preference is still given to group C. It contains unpretentious and frost-resistant plants, such as the incomparable Countess de Bouchot.
Clematis flowering times
The time for bud formation depends on various factors. In southern latitudes, flowering begins earlier, in northern latitudes later. In central Russia, including the Moscow region, clematis blooms in June, but some species only in July.
Fertilizing with organic fertilizers will help speed up the flowering process of clematis. Extracting the slurry will provide the plants with nitrogen and microelements, and the decomposition process in the soil will continue with the release of heat.
Young bushes bloom later. Lianas with a strong developed root system adapt faster after winter and enter the flowering season in summer.
Fertilizing clematis in spring for flowering
- On May 1-10, feed clematis with urea. Dilute a spoonful of powder or granules in a bucket of water and water the soil near the stem.
- On May 10-20, select the time to add organic matter. The vine needs a large supply of nitrogen to produce the maximum number of shoots.
- On June 1-15, scatter complex mineral fertilizer on the ground. When watering, it will dissolve and nutrients will flow into the plant.
During the period of bud formation, add superphosphate. This is the last feeding of clematis for the season!
Note! Some mineral fertilizers contain chlorine, which clematis cannot tolerate.
Buy seedlings only in specialized stores or grow from seeds, like lobelia or other flowers.
Reproduction
You can propagate clematis:
- seeds;
- cuttings;
- layering;
- in divisions.
Important! When planting clematis seeds for seedlings, the varietal qualities of the garden crop may be lost.
The most popular method of propagating clematis is cuttings. The procedure for preparing cuttings is as follows:
- Shoots are cut out from the bushes and divided into separate cuttings about 10 cm long.
- The resulting segments are soaked for 24 hours in a growth stimulator.
- Then the planting material is planted under cover in the greenhouse.
- Before the first roots appear, it is necessary to regularly moisten the soil under the seedlings.
- As soon as the cuttings have formed a full-fledged root system, they are moved to a permanent place in open ground.
Reproduction by layering is carried out in October. In this case, the following scheme is adhered to:
- Take the lower shoots from the bush and trim them down to the first bud.
- Having connected 3-4 shoots, they are lowered to the ground and buried at the end into a shallow groove.
- To prevent the branches from straightening, they are fixed and sprinkled with soil, lightly compacting it.
- As soon as cold weather sets in, the tied bunch of shoots is covered with spruce branches.
- In spring, the cover is removed and the layering is watered.
- In autumn they are separated from the mother bush.
Only young bushes can be divided. It is impossible to divide adult bushes because their root system is too complex. It is hardly possible to untangle and separate the roots without damaging them.
To divide the bush, clematis is dug up in the fall, while preserving the earthen lump. Each part should have 2-3 buds and the same number of roots.
Diseases and pests
A distinctive feature of these flowers is their immunity to many diseases. Viral infections do not affect clematis at all. Their only vulnerable point is Wilt wilt, a fungal disease that causes rapid drying of leaves. If you notice the disease in time, the bush can be saved. To do this, it is sprayed with fungicides. At later stages, the plant must be dug up along with a ball of earth and burned to prevent the spread of infection.
Insects are not attracted to flowers, except for the nematode. Any insecticide can be used to control this pest.
Transplanting clematis: when is the best time to carry out the procedure?
Many gardeners are concerned about the question: when can clematis be transplanted to another place. It is advisable to do this at the end of August or beginning of September, as well as in the spring - at the end of April or beginning of May. Replanting clematis in the fall should be done before frost sets in, otherwise the seedling may not take root and die.
Transplanting clematis to another location is usually necessary if the main location for the plant was incorrectly chosen. It is also worth replanting the bush if it gets old. If the procedure is needed due to a disease, spill the new planting site with Trichoflor solution (5 g per bucket of water), and after planting, mulch the soil with wood ash.
If the time for transplanting clematis is chosen in the fall, the vine should be trimmed first, which you will read about below. Dig the bush with 1-2 shovels and remove it along with the earthen lump. Shake soil off the roots and divide them into sections of 4-6 stems using a pruning saw or hatchet. Roots that are too long can be trimmed with pruning shears. Make sure that the roots do not dry out during the transplanting process. And immediately after transplanting, water the clematis with water.
Transplantation of adult clematis of any pruning group can take place without division. But if the plant is more than 6-7 years old, you still have to divide it. By this age, the roots of clematis become powerful and long, so it will not be possible to carry out the procedure quickly. It is better to take your time to keep the root system intact. Photo source: myxobbiklematisi.blogspot.com
